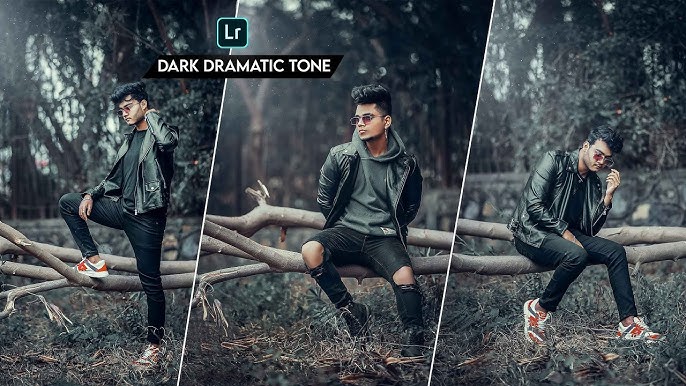
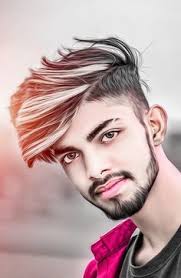
In the world of photo editing, various styles and effects allow photographers and designers to evoke different moods and emotions. One such powerful technique is the darktone effect, which creates a dramatic, moody, and often cinematic look. This effect is widely used in portrait photography, fashion shoots, and even landscape imagery to add depth and intensity.
In this article, we will explore:
-
What the darktone effect is
-
Why it’s popular in photography
-
Step-by-step methods to achieve it
-
Best tools and software for darktone editing
What Is the Darktone Effect?
The darktone effect (or dark tone effect) is a photo editing technique that emphasizes shadows, reduces brightness, and enhances contrast to create a deep, moody atmosphere. Unlike high-key photography, which is bright and airy, darktone images rely on low-key lighting, rich blacks, and muted highlights.
Characteristics of Darktone Photos:
-
Deep Shadows & Contrast: Enhances dark areas while keeping highlights subtle.
-
Desaturated or Muted Colors: Often leans towards cooler tones (blues, greens) or warm tones (oranges, browns).
-
Dramatic Lighting: Uses directional light to create strong shadows.
-
Vignetting: Darkened edges draw focus to the subject.
This effect is commonly seen in genres like:
-
Portrait Photography (moody, emotional shots)
-
Street Photography (gritty, cinematic scenes)
-
Fashion & Editorial Photography (high-end, dramatic looks)
-
Landscape Photography (mysterious, atmospheric scenery)
Why Use the Darktone Effect?
-
Creates Emotional Impact – Dark tones evoke mystery, melancholy, or intensity.
-
Enhances Depth & Dimension – Shadows add a 3D feel to flat images.
-
Focuses on the Subject – By darkening distractions, the main subject stands out.
-
Gives a Cinematic Look – Resembles movie stills with high contrast and moody tones.
How to Achieve the Darktone Effect: Step-by-Step Guide
You can achieve this effect using various tools like Adobe Lightroom, Photoshop, or even mobile apps like VSCO or Snapseed. Below is a general workflow:
1. Start with the Right Photo
-
Shoot in RAW format for better editing flexibility.
-
Use low-key lighting (side lighting or backlighting works best).
-
Avoid overexposed areas, as darktone editing relies on recoverable shadows.
2. Basic Adjustments (Lightroom/Photoshop)
-
Lower Exposure & Brightness – Slightly underexpose the image.
-
Increase Contrast – Enhances the difference between light and dark.
-
Reduce Highlights & Whites – Prevents washed-out areas.
-
Boost Shadows & Blacks – Recovers some detail in dark areas.
3. Color Grading for a Moody Look
-
Desaturate Colors – Muted tones enhance the dark aesthetic.
-
Cool or Warm Tones – Shift hues towards blue (cool) or orange/teal (cinematic).
-
Split Toning – Add a slight color tint to shadows (e.g., dark blue) and highlights (e.g., soft orange).
4. Enhance Details & Texture
-
Clarity & Dehaze – Slight increase adds depth (but don’t overdo it).
-
Sharpening & Noise Reduction – Keeps the image clean in low-light areas.
-
Vignette – Darkens the corners to focus attention.
5. Final Touches (Optional)
-
Add Film Grain – Gives a vintage, cinematic feel.
-
Dodge & Burn (Photoshop) – Manually brighten or darken specific areas.
-
Use Presets/Filters – Many editing apps have darktone presets for quick results.
Best Software for Darktone Editing
| Tool | Best For |
|---|---|
| Adobe Lightroom | Non-destructive editing, presets |
| Adobe Photoshop | Advanced masking & dodge/burn |
| VSCO | Mobile editing with darktone filters |
| Snapseed | Free mobile editing with selective adjustments |
| Capture One | Professional color grading |
Conclusion
The darktone effect is a powerful way to transform ordinary photos into dramatic, emotion-filled artworks. By mastering shadow control, contrast, and color grading, you can create stunning visuals that stand out. Whether you’re editing portraits, landscapes, or street photography, this technique adds a cinematic and professional touch.


